Author: Jenna White | San Francisco Hairstylist
May 26th, 2021
May 26th, 2021
This blog on shoulder length hair has been my number one post since it came out. It's been broken into two parts: (1) Cutting Your Hair to Shoulder Length and (2) Growing Your Hair From Shoulder Length to Long (in case you change your mind after taking the plunge).
CUTTING YOUR HAIR TO SHOULDER LENGTH
Let's break the concept of "shoulder length" into three categories:
1. Just above the shoulder
2. On the shoulder
3. Collarbone length
During consultations with my clientele I always pause when they say “around shoulder length” for their desired look. We're talking about centimeters of difference here, but it truly changes everything.
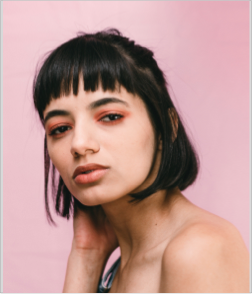
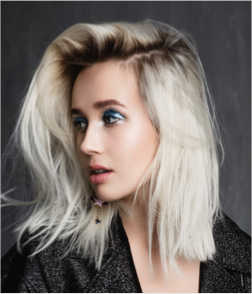
1. JUST ABOVE THE SHOULDER
Starter bob length. Unicorn length. Absolutely stunning, but it doesn't take long before you run into some of the problems from the “on the shoulder” category (cut #2). If you aren't sold on going to a shorter bob, or this is your first time going above the shoulder, it's a must try. However, after you experiment with this length, and like the results, go a bit shorter so you won't have to get haircuts as frequently. You can probably only have a low ponytail “nub” that I think is darling, but it's not everyone’s favorite.
Pros: Less time to blow dry. It's a fun, and true, bob. Don't think, just do it!
Cons: You may have to style it every day, plus learn new techniques. Curling can be tricky. Frequent cuts will be needed (see my guide on timing haircuts below). If you have really dense hair, you'll need a stylist who can handle debulking (that's true of all the haircuts listed in this post, but especially this one).
1. Just above the shoulder
2. On the shoulder
3. Collarbone length
During consultations with my clientele I always pause when they say “around shoulder length” for their desired look. We're talking about centimeters of difference here, but it truly changes everything.
1. JUST ABOVE THE SHOULDER
Starter bob length. Unicorn length. Absolutely stunning, but it doesn't take long before you run into some of the problems from the “on the shoulder” category (cut #2). If you aren't sold on going to a shorter bob, or this is your first time going above the shoulder, it's a must try. However, after you experiment with this length, and like the results, go a bit shorter so you won't have to get haircuts as frequently. You can probably only have a low ponytail “nub” that I think is darling, but it's not everyone’s favorite.
Pros: Less time to blow dry. It's a fun, and true, bob. Don't think, just do it!
Cons: You may have to style it every day, plus learn new techniques. Curling can be tricky. Frequent cuts will be needed (see my guide on timing haircuts below). If you have really dense hair, you'll need a stylist who can handle debulking (that's true of all the haircuts listed in this post, but especially this one).
|
|
|
|
|
Photos: www.unsplash.com
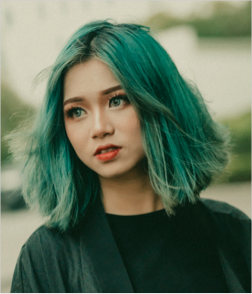
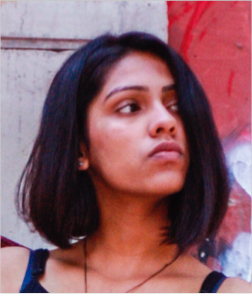
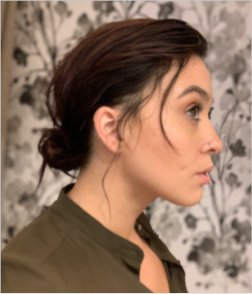
2. ON THE SHOULDER
With this length, you can get all of your hair into a low pony, but might have some front pieces breaking loose. High pony is possible, but pinning the back can be messy. For most people, this length flips from hitting the shoulder. Some don't mind it, and others hate it. Certain hair types will flip aggressively, but it ranges depending on texture, quality of the cut, and styling technique (which is up to you after leaving the chair). In my opinion, this length is perfect for someone who has thicker hair, no layers, shorter neck, wavy to curly texture, and isn't ready for a short bob.
Pros: Still able to pull back in a pony if needed. A good haircut will minimize the flip for the first two weeks.
Cons: The flip. It will show up eventually as the haircut grows out. Ponytail may feel messy for folks used to longer hair.
|
|

|
|

|
Photos: www.unsplash.com
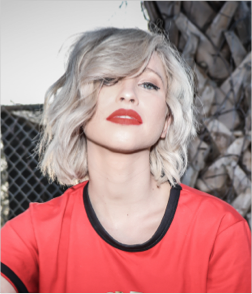
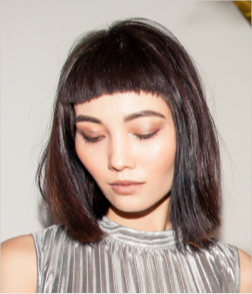
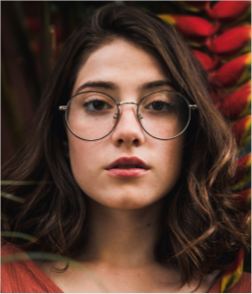
3. COLLARBONE LENGTH
Also known as a long bob or "Lob". It varies from person to person, but at this length you should be able to fit all of your hair in a low to medium-high ponytail. In a high pony the hair in the nape slips out. If you're okay with using two bobby pins that shouldn't be a problem. Wearing a bun usually works with this length as well. Check out Byrdie's "49 Flattering Shoulder-Length Hairstyles" for more celebrity short-ish hair inspiration.
Pros: Easiest short length to throw in a pony, and you don't have to deal with the grow out/ flip.
Cons: It's not a bob. If you already have hair short enough to almost be a bob, go shorter. There's nothing like the feeling of having truly short hair and seeing space between your ends and shoulders. So less of a con, and more of my own opinion.

|

|
|

|

|
Photos: www.unsplash.com
Check out the guide I built for my clients below to help them keep track of how often to book haircuts depending on their length.

GROWING YOUR HAIR FROM SHOULDER LENGTH TO LONG
I went through the process of growing my hair out from "just above the shoulder" to longer than "collarbone length". If you're trying to understand what returning to long hair will look like if you don't love your new shoulder length haircut, check out my overview below.
FIRST SIX MONTHS
It took about six months to grow my hair from chin length to "just above shoulder length". Between April and October of 2019 (see pictures below) I only had two minimal trims to help my hair stay healthy as it grew. Once it reached that length, I opted to avoid any further coloring to prevent breakage, and covered the purple hue with a color that was as close as possible to my natural.

April 2019
|

October 2019
|
NEXT TWO MONTHS
By November and December of 2019, I was able to add in more up-styles into my routine, like this small bun and braided crown (see below). I avoided further trims between October 2019 and February 2020, trying to give my hair more time to grow after I had paused coloring.
By November and December of 2019, I was able to add in more up-styles into my routine, like this small bun and braided crown (see below). I avoided further trims between October 2019 and February 2020, trying to give my hair more time to grow after I had paused coloring.
November 2019
|

December 2019
|
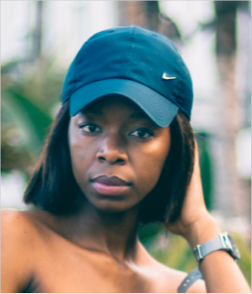
NEXT SIX MONTHS
To protect from breakage, I started wearing my hair back under a hat or bandana whenever I could (this was much easier during COVID). For me, protein treatments once a week were helpful, but shouldn't be done more than that. If you have thicker hair, moisturizing treatments in the form of masks can be done more often as well. See my blog post on Hygral Fatigue to understand if your hair needs more protein or moisture when you're growing it out.
To protect from breakage, I started wearing my hair back under a hat or bandana whenever I could (this was much easier during COVID). For me, protein treatments once a week were helpful, but shouldn't be done more than that. If you have thicker hair, moisturizing treatments in the form of masks can be done more often as well. See my blog post on Hygral Fatigue to understand if your hair needs more protein or moisture when you're growing it out.
February 2020
|

June 2020
|